iOS 水波纹动画效果

这篇文章带来一个水波纹动画效果,实现相对简单。效果如下:
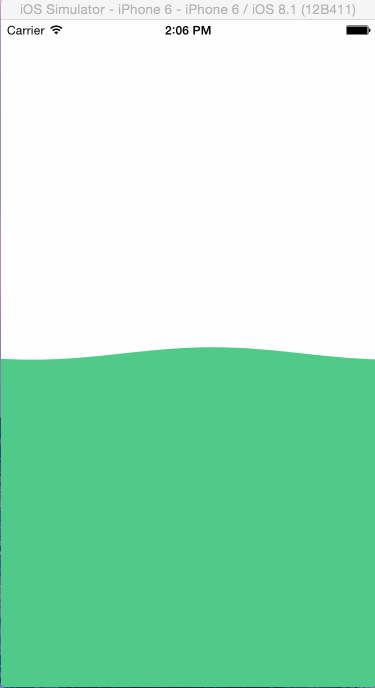
水波纹效果图

实现思路

1、正弦函数(sin)

sin

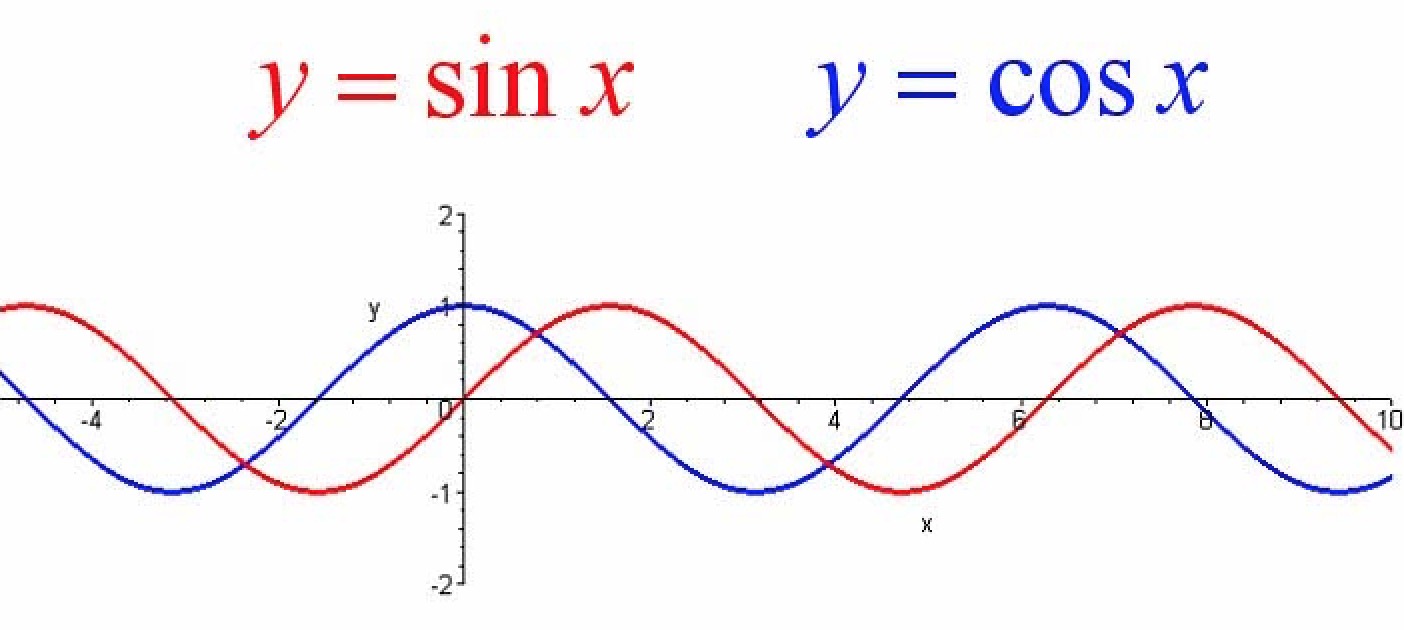
Note :先普及一下正弦函数,高手请忽略!

对于: y = sin(x) y = A sin (a x + b) 通过 A a b 三个参数,对 sin 函数的形状进行相应的变换。

y = sin(x)

  • 在 x 轴方向平移 |b| 个单位(左加右减)–> y = sin(x + b)
  • 横坐标伸长(0 < a < 1)或者缩短(a > 1) 1/a 倍 –>y = sin(ax + b)
  • 纵坐标伸长(A > 1)或者缩短(0 < A < 1) A 倍 –>y = Asin(ax + b)

这里动画的实现就是利用这三个参数的变化产生的。

2、CAShapeLayer – 绘制水波

我们通过 CAShapeLayer 传入路径(UIBezierPath),对水波纹进行绘制。绘制代码如下:

1
2
3
4
5
6
7
8
9
10
11
12
13
14
15
16
17
18
- (CGPathRef)waterWavePath
{
UIBezierPath *path = [UIBezierPath bezierPath];
[path moveToPoint:CGPointMake(0, self.waterWaveHeight)];
CGFloat y = 0.0f;
for (float x = 0; x <= ScreenRect.size.width; x ++)
{
y= self.zoomY * sin( x / 180 * M_PI - 4 * self.translateX / M_PI ) * 5 + self.waterWaveHeight;
[path addLineToPoint:CGPointMake(x, y)];
}
[path addLineToPoint:CGPointMake(ScreenRect.size.width, ScreenRect.size.height)];
[path addLineToPoint:CGPointMake(0, ScreenRect.size.height)];
[path addLineToPoint:CGPointMake(0, self.waterWaveHeight)];
[path closePath];
return [path CGPath];
}

说明:其中 for 循环中的代码就是 sin 函数路径,通过每两个点直接的直线连接。

3、 CADisplayLink – 让水波动起来

CADisplayLink是一个能让我们以和屏幕刷新频率同步的频率将特定的内容画到屏幕上的定时器类,和 NSTimer 有些类似。

CADisplayLink以特定模式注册到runloop后,每当屏幕显示内容刷新结束的时候,runloop就会向CADisplayLink指定的target发送一次指定的selector消息, CADisplayLink类对应的selector就会被调用一次。

具体的介绍可以参考这篇博文介绍:CADisplayLink

1
2
3
4
5
- (void)startDisplayLink
{
self.displayLink = [CADisplayLink displayLinkWithTarget:self selector:@selector(handleDisplayLink:)];
[self.displayLink addToRunLoop:[NSRunLoop currentRunLoop] forMode:NSDefaultRunLoopMode];
}

为了让水波效果更加逼真,可以调整 sin 函数中的几个参数值。

1
2
3
4
5
6
7
8
9
10
11
12
13
14
15
16
17
18
19
20
21
22
23
- (void)handleDisplayLink:(CADisplayLink *)displayLink
{
self.translateX += 0.1;// 平移
if (!self.flag)
{
self.zoomY += 0.02;
if (self.zoomY >= 1.5)
{
self.flag = YES;
}
}
else
{
self.zoomY -= 0.02;
if (self.zoomY <= 1.0)
{
self.flag = NO;
}
}
self.shapeLayer.path = [self waterWavePath];
}

代码链接

大功告成:Github 下载地址